Working with Skin tones using Blending Ranges
In Affinity Photo, we can change skin tones using blend modes and blending ranges

When working with AI Art, I often need to make changes to skin tones, so I watched various videos on the topic. These videos are great, and I advise you to have a look. However, occasionally, we just want to have something to read as a quick reference, reminder, or overview. That was my motivation for writing this article.
It is a short version and overview of what you can learn quite well by watching the videos I have linked in.
The basic idea here is that you can use color burn to darken a skin color. However, a color dodge alone doesn't work well since it will get too dark everywhere. That is why using blending ranges, discussed here, is so useful.
Understanding Blend Modes
You are probably played around with blend modes such as darken, multiply, color burn, lighten and luminosity before. Just playing with these modes helps develop a sense of what they do. But how do you take that knowledge and apply that to something practical?
I think it is useful to know the main categories each blende mode belongs to.
Darken:
Darken
Multiply
Color burn – Tonal range compressed. Dark areas get darker, but light areas are preserved.
Linear burn
Darken color
Lighten:
Lighten
Screen
Color dodge
Linear dodge
Lighter color
Color:
Hue
Saturation
Color
Luminosity
Contrast:
Overlay
Soft light
Hard light
Vivid light
Here a British gentleman does a very thorough discussion of blend modes:Blend Modes in Detail: How Color Burn Works
The video specifically talks about color burn, which, I think, is useful to discuss as it is often not well understood but still used quite a lot. Typically, with a color burn, you put some gray value on top of another layer. A darker gray will cause more darkening, while a lighter gray will darken less. So, what exactly can you use a color burn for?
Darken shadows
Deepening colors
So relevant for anyone working on portraits like me is the ability to, for example, give somebody more of a skin tone. If somebody has a pale skin, you can use color born to deepen their skin tone. But keep in mind that you don't adjust the skin tone with a color burn alone. In one of the sections further down, I discuss more specifically how different effects can be combined to adjust skin tone.
Blending Ranges for Layers
How are blending ranges useful for your work? Say you need to alter skin tones, do color corrections or color changes in your images. One approach to these problems would involve using blending ranges. It can be disorienting that there are so many ways to achieve the same thing, though. Remember, this is just one of many strategies.
Robin Whalley has a great explanation on YouTube of blending ranges: How to Use Affinity Photo Blending Ranges.
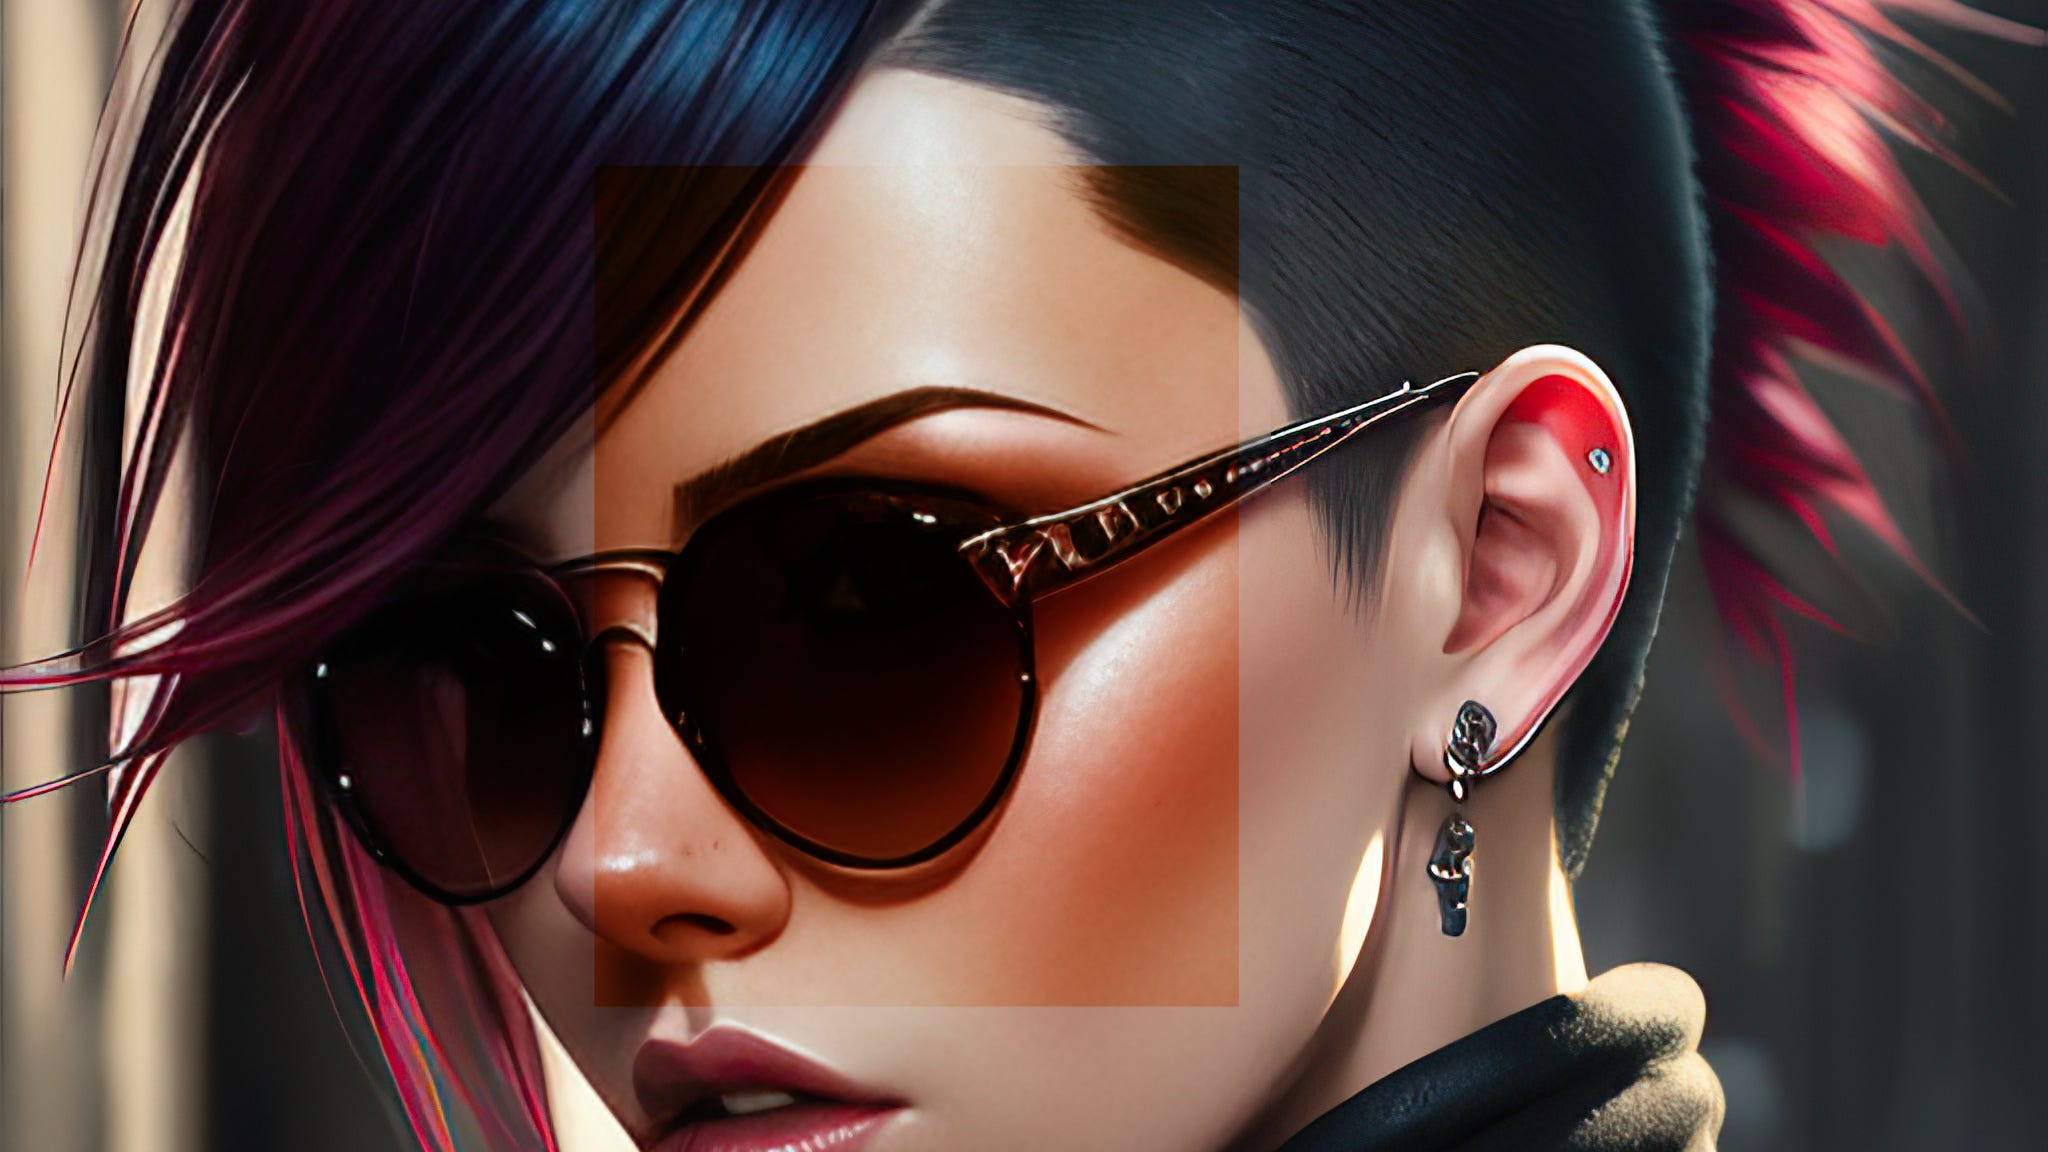
Let me give a little summary and context. You may have noticed that you can add layers on top of each other and do things such as multiply, color burn, darken and lighten. Usually, these effects apply to the whole layer below. E.g. I could add a big pink square on top of a photo of a person. If I choose to multiply, then all the colors below will turn pinkish.

But perhaps I only want that to apply to a subset of the colors in the layer below. For instance, maybe I only want the highlights of the skin tones to turn pinkish. That is where blending ranges come into play. Have you noticed the opacity slider for a layer? You can turn down the opacity to limit the effect of a top layer. What if you could drag the opacity slider for only highlights, mid-tones or shadows? That is what blending ranges allow you to do.
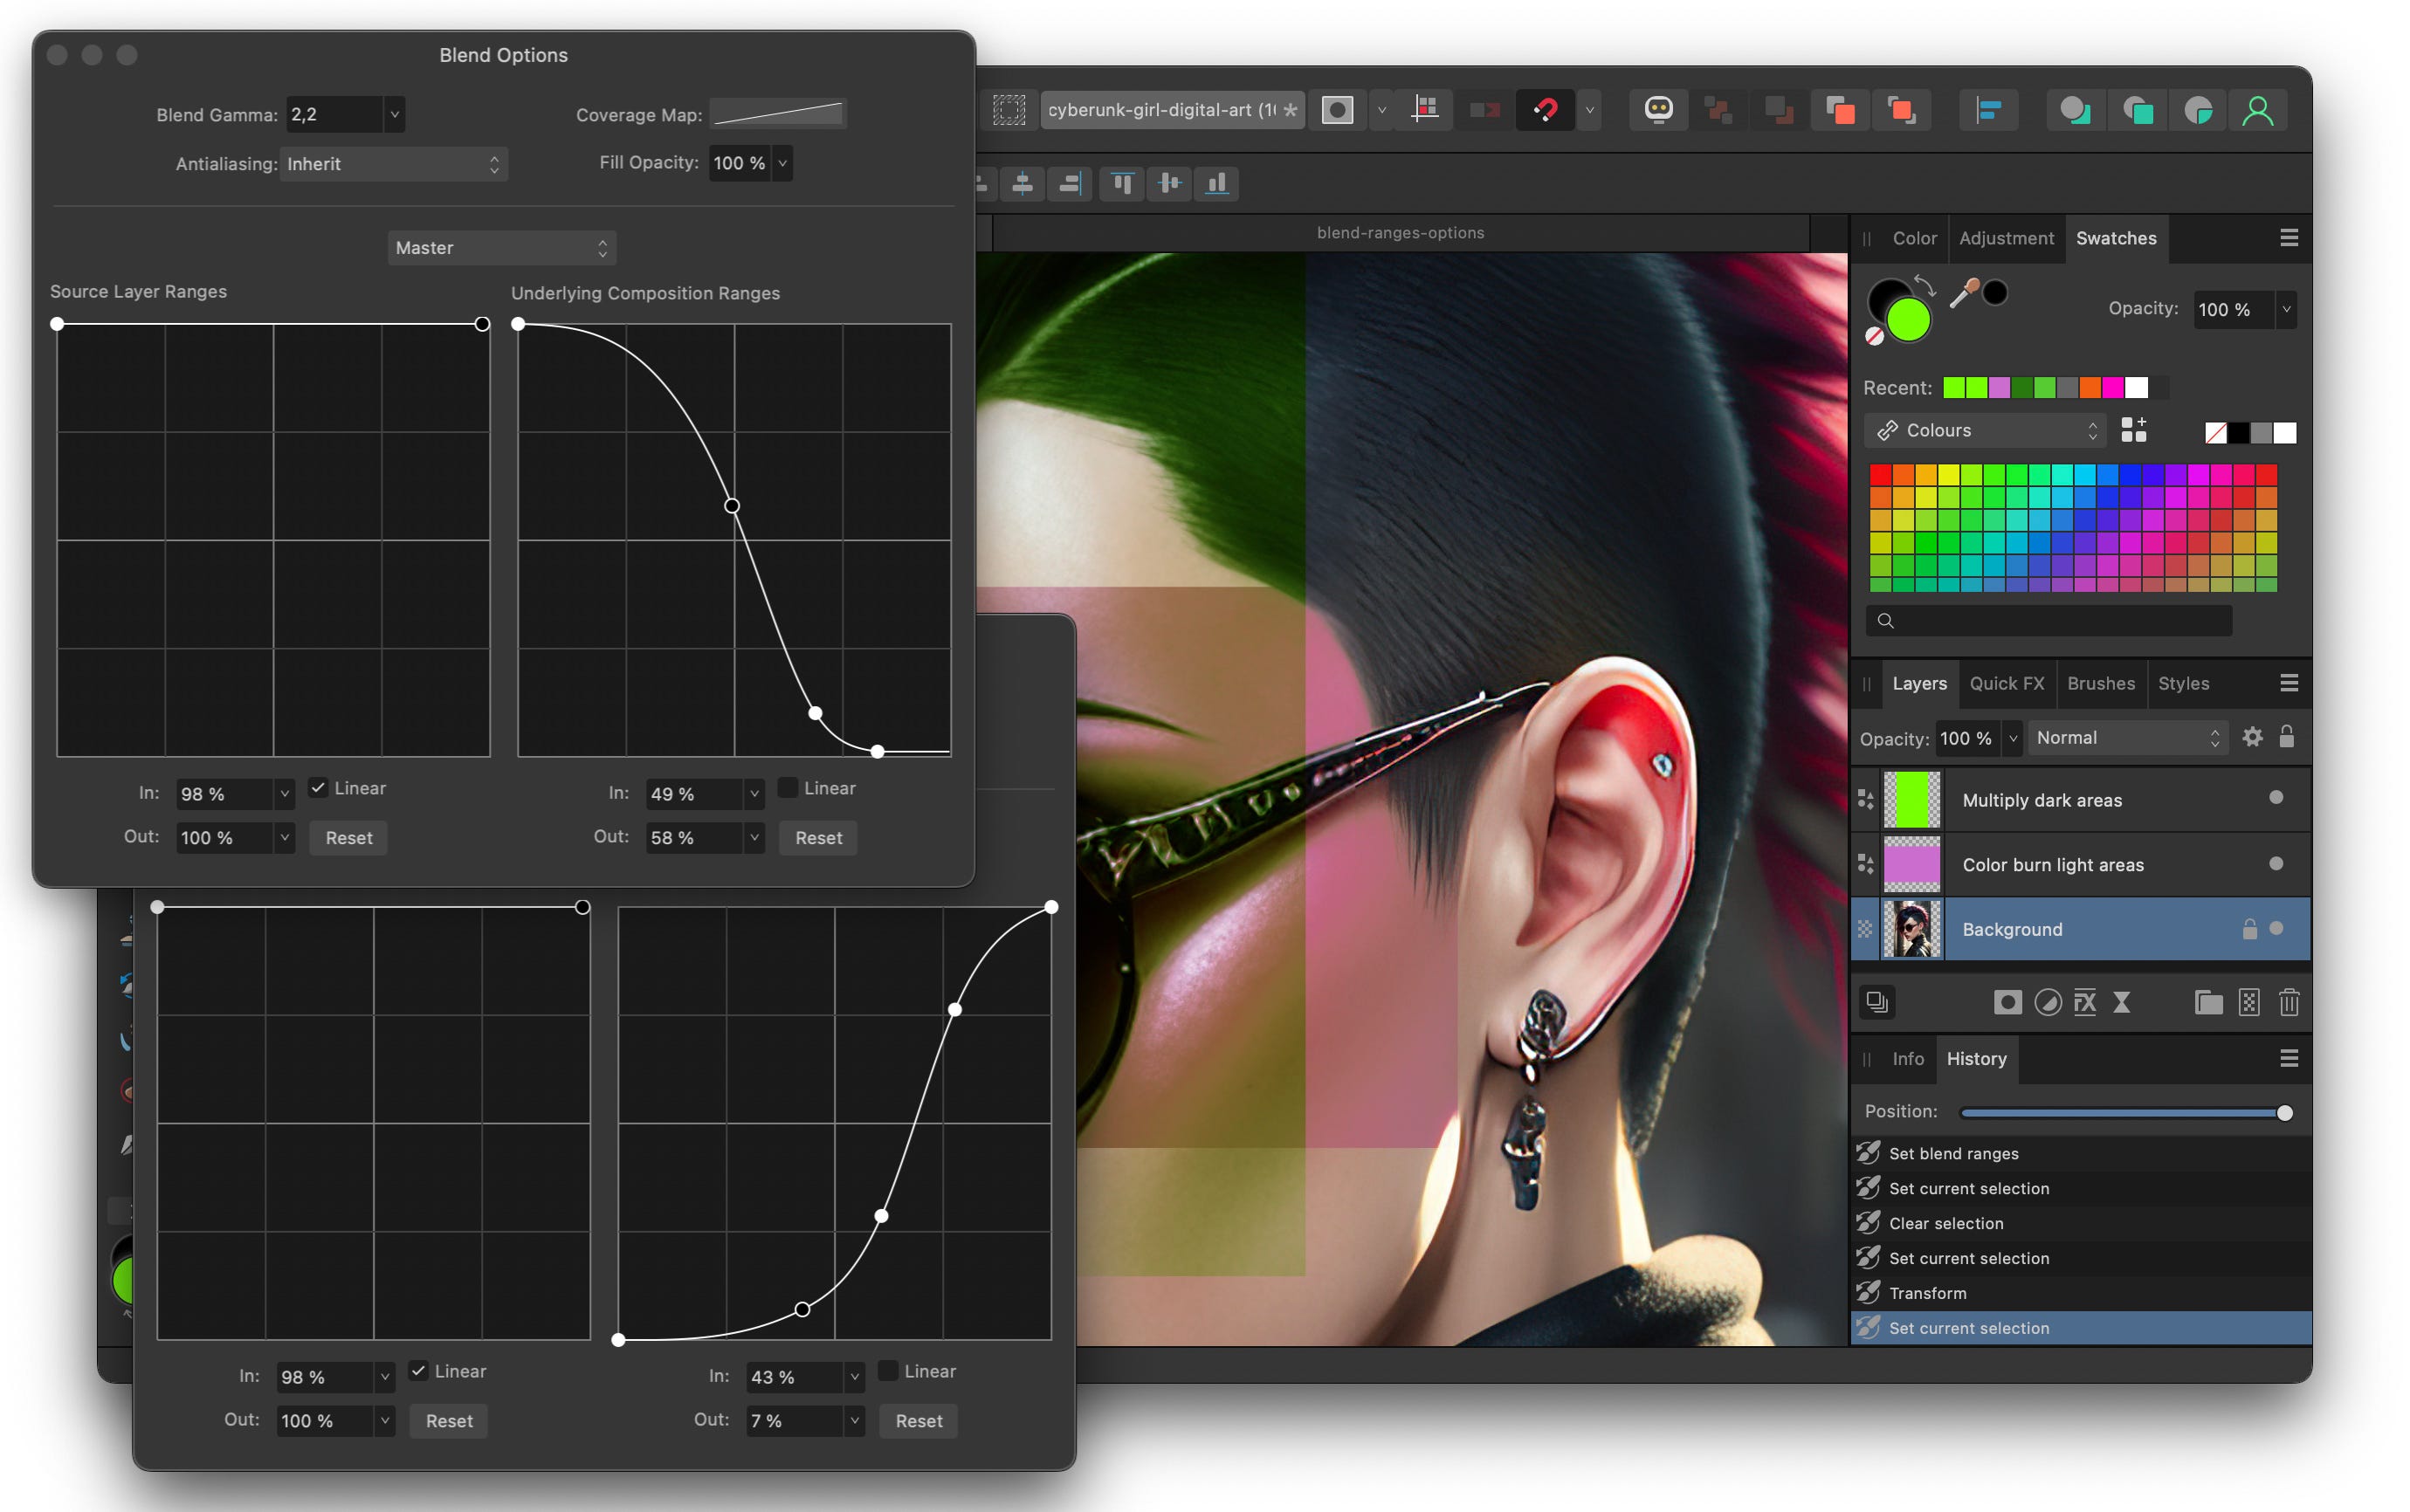
The source layer ranges can be used to specify opacity for different tone ranges (light, mid-tones, shadows). The underlying composition rangeswork a bit opposite: opacity is determined by the tone of the layer below. So if you pull down the curve at the high-end you will see bright areas in the layer below shining through.

Skin Tone Adjustments using Blending Ranges
Whalley really just explains the theory around blending ranges.
Olivio Sarikas, in contrast, shows how we can use blending ranges together with color burn and multiply to do skin color adjustments in Affinity Photo: Affinity Photo - Skin Color & Tan.
The technique Olivio uses is to use a gray layer to color burn the skin tones, basically to deepen the colors. But he doesn't want it to affect the dark areas. Remember, color burn makes dark areas very dark. Thus, Olivio uses blending ranges (underlying composition ranges) to lower opacity for only the dark areas. At zero opacity, the underlying layer will shine through completely. Olivio sets opacity to very low for the darker tones, so they shine through. That means our gray layer on top only does color burn on the mid-tones and highlights.
Interestingly, he has two colors burn layers. He makes a second one which only influences highlights.
Still are left with the shadow areas unchanged. That is not ideal because if you want to give somebody a suntan, then you don't want dark tones to be entirely unchanged. Say somebody is very pale, then the dark tones will not become dark brown or orange, which is closer to what you want. I speculate that is the primary reason Olivio uses an orange multiply layer to affect the dark tones. Of course, he uses blending ranges again, but this time to exclude the bright colors and mid-tones.
Below is an illustration of what Olivio does with different colors. You can see that we swapped the blending ranges graphs so that one layer affects bright tones while the other affects dark tones.